Posts

Showing posts from March, 2009

Sweet Hawaiian Bread

Image
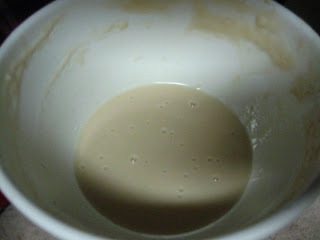
I really like sourdough bread. So, I thought I would try to make some. It was a long process and when I finally made it, it was good, but it wasn't sourdough. It turned out tasting VERY much like that sweet hawaiian bread you buy. So, that's what I'm calling it and you can decide whether or not you want to try it. I will be trying another sourdough recipe soon, so stay tuned. 1 cup sugar 1/2 cup oil 1 tsp salt 1 - 1/2 cups warm water 1 cup sourdough starter 6 cups bread flour Mix all ingredients thoroughly. Oil bottom & sides of large bowl & put bread dough in. Let stand overnight at room temperature. In morning, punch dough down 4-5 times and divide into 3 equal balls. Kneed each ball 8-10 times and put into 3 greased and floured loaf pans. Brush tops with oil and cover with oiled foil. Let stand 4-5 hours or all day. (If dough has not risen well, put small pan of water on bottom rack in oven, heat to 200 degrees, turn off oven. Put dough on top rack for 1-2 hours.

Basic Friendship Bread

Image
Some call this Amish Friendship Bread. It's called friendship bread because you give your friends a starter so that they can make their own and you keep passing it on and sharing it. I only give it to those that want it, so if you want one, ask me and I will gladly give you a starter. :) You can make this in a bundt pan like I did, or use 2 loaf pans. Either way it's very yummy. 1 cup starter 1 cup oil 1/2 cup milk 3 eggs 1 tsp vanilla In a separate bowl combine the following dry ingredients and mix well: 2 cups flour 1 cup sugar 1-1/2 tsp baking powder 2 tsp cinnamon 1/2 tsp baking soda 1 - (5.1 oz) box instant vanilla pudding 1/2 tsp salt 1 cup nuts Add dry ingredients to wet ingredients. Mix and pour into two well greased and sugared bread pans. Bake at 325 degrees for 1 hour. Click here for more variations you can try.

Sourdough/Friendship Bread Starter

Image
This is how I made my starter and how you can make yours...For mine I decided to use a little bit of yeast to give it a good start, but I have heard you don't have to. 1 (.25 ounce) package active dry yeast (this is 2 1/4 tsp bulk yeast) 1/4 cup warm water from tap 3 cups all-purpose flour, divided 3 cups white sugar, divided 3 cups milk Dissolve the yeast in the water and let stand 10 minutes. In a glass or ceramic bowl combine the flour and sugar well and then slowly add in the milk and the dissolved yeast. Cover with towel and set on countertop. This is day 1 of the 10 day process. Note: * If I gave you a starter, you would start on Day 2. Day 1: See above Day 2: Stir Day 3: Stir Day 4: Stir Day 5: Add 1 cup flour, 1 cup sugar, 1 cup milk and stir Day 6: Stir Day 7: Stir Day 8: Stir Day 9: Stir Day 10: Add 1 cup flour, 1 cup sugar, 1 cup milk and stir together Divide the starter out into 1 cup portions. Leave the remainder in the bowl and consider that Day 2 in your next c

Guest Post from Ray - Sweet and Garlicky Pork Chops

Ray makes these very yummy pork chops on the grill every so often. They are sooo wonderful - you must try them. Thanks honey for the great posting! Ray usually doubles this recipe. The following Excerpt is from "The Barbecue Bible" By Steven Raichlen Sweet and Garlicky Pork Chops One of the constants in the world of barbecue is the pairing of grilled meats with garlic. Another is the use of a sugar- or honey-based marinade to counterpoint the richness of a meat like pork. Put them together and you get this Thai-style barbecue, which is made here pork chops but could also be used for pork tenderloin or loin. I like to use 1-inch thick loin chops for this recipe, but you can also use twice as many of the more widely availible thin chops. Jasmine Rice would make a good accompaniment. 4 thick (1 inch) or 8 thin (1/2 inch) pork chops (about 2 pounds in all) 1 head garlic, broken into cloves and peeled 3 tablespoons sugar 1/2 cup Asian fish sauce or soy sauce 3 tablespoons hone

Another loaf type of the Artisan bread...

Image
I have been reading more in my new cookbook about the different ways to use the master dough. If you don't know what I am referring to, check the post right below this one. Another way listed to make the bread was in a loaf pan. This appealed to me because then I could have regular slices instead of small weird shaped slices. Also, it was nice because I didn't need the stone or the pizza peel. So, if any of that describes you, this is the way to do it. Use the same dough you already have made in the fridge. Flour the top of it and break off 1 1/2 pound piece, about the size of a cantalope. Shape it into a ball the same way as before, but then elongate it into an oval. Place the oval loaf of dough into your greased loaf pan and let it sit to rise for about 1 hour and 40 minutes. The dough before rising should fill your pan just a little past half way. After rising, flour the top of the dough and slice the top with a sharp bread knife, place your loaf pan in the middle of the ove

Artisan Bread

Image
I had heard about this cook book called Artisan Bread in Five Minutes a Day , I love learning new ways to bake bread and this just seemed like a great system! So, I had a giftcard to the bookstore from Christmas and got it a couple weeks ago. At first I was going to wait until I had all the perfect supplies (the dough riser bucket and pizza peel) but I decided today that I couldn't wait! So, I didn't have a big enough bowl - so I mixed it up and then split it into two bowls. It worked fine. I used my stoneware bar pan from pampered chef instead of a pizza stone or bread stone and for my pizza peel I used a flat cookie sheet. It sounds like a lot of time, but really it's no more time than any other bread recipe and the amount of acutal labor you put into it is wayyy less. Just pick a time when you are going to be home and go for it! It turned out sooo yummy! Try it and let me know. The cookbook has many, many other recipes, so I'm sure you'll get a lot of posts abou